Mazda CX-9 Owners Manual: Instrument Cluster (Type A)
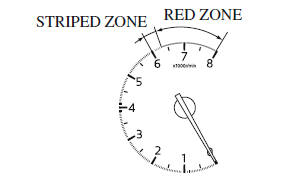
Speedometer The speedometer indicates the speed of the vehicle. Tachometer The tachometer shows engine speed in thousands of revolutions per minute (rpm). CAUTION Do not run the engine with the tachometer needle in the RED ZONE. This may cause severe engine damage.
NOTE When the tachometer needle enters the STRIPED ZONE, this indicates to the driver that the gears should be shifted before entering the RED ZONE. Multi-information Display (Type A)
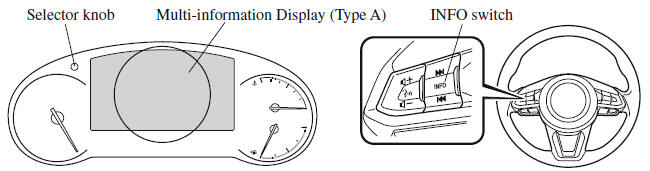
The multi-information display indicates the following information.
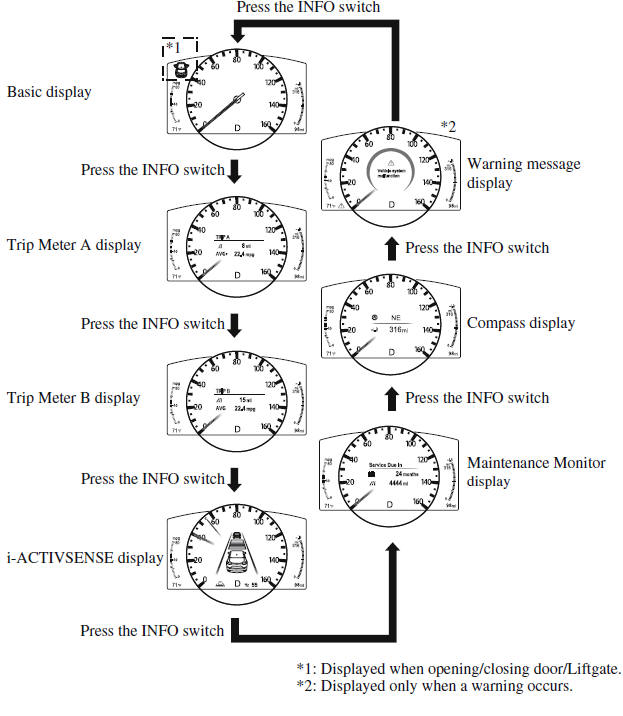
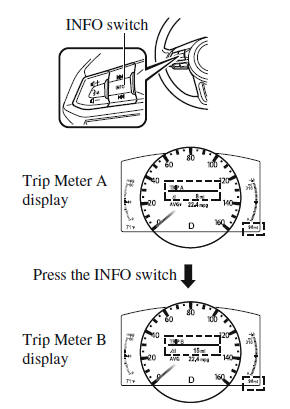
The screen content changes each time the INFO switch is pressed.
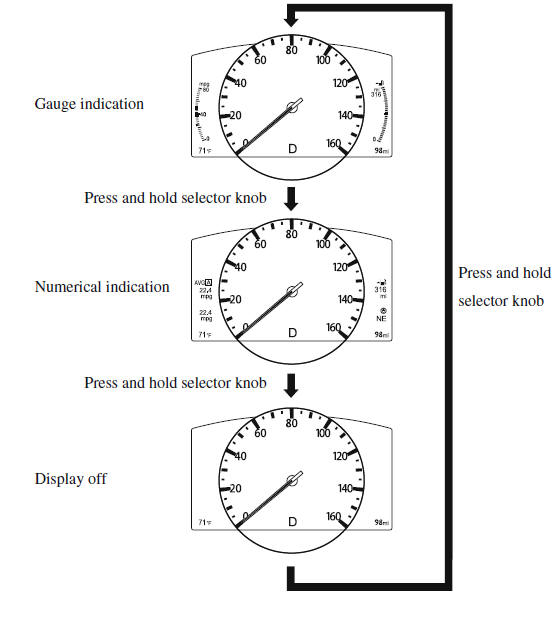
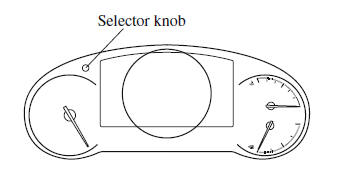
The screen content changes each time the selector knob is pressed and held.
Odometer, Trip Meter and Trip Meter Selector The odometer is constantly displayed on the screen when the ignition is switched ON, and the TRIP A or TRIP B screen can be displayed by operating the INFO switch.
Odometer The odometer records the total distance the vehicle has been driven. Trip meter The driving distance for a specified interval is indicated. Two types (TRIP A, TRIP B) of interval distance and the average fuel economy for each can be measured. For instance, trip meter A can record the distance from the point of origin, and trip meter B can record the distance from where the fuel tank is filled. When trip meter A is selected, TRIP A will be displayed. When trip meter B is selected, TRIP B will be displayed. The trip meter and average fuel economy can be reset by pressing the INFO switch for 1.5 seconds or more while in each mode. NOTE
Engine Coolant Temperature Gauge Displays the engine coolant temperature. The blue gauge indicates that the engine coolant temperature is low, and the red gauge indicates that the engine coolant temperature is high and overheating.
CAUTION If the engine coolant temperature gauge needle is in the red range, there is the possibility of overheating. Drive slowly to reduce engine load until you can find a safe place to stop the vehicle and wait for the engine to cool down. NOTE
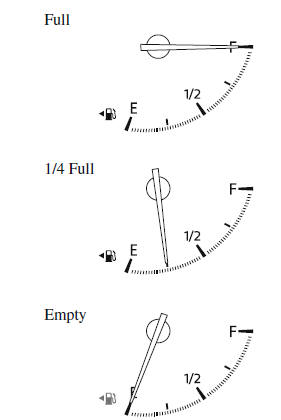
Fuel Gauge The fuel gauge shows approximately how much fuel is remaining in the tank when the ignition is switched ON. We recommend keeping the tank over 1/4 full.
If the low fuel warning light illuminates or the fuel level is very low, refuel as soon as possible. NOTE
Dashboard Illumination When the lights are turned on with the ignition switched ON, the brightness of the dashboard illumination is dimmed. However, when the light sensor detects that the surrounding area is bright such as when the lights are turned on in the daytime, the dashboard illumination does not dim. NOTE
The brightness of the instrument cluster and dashboard illuminations can be adjusted by rotating the knob.
Function for canceling illumination dimmer The illumination dimmer can be canceled by rotating the dashboard illumination knob to the right until a beep sound is heard while the instrument cluster is dimmed with the ignition switched ON. If the instrument cluster's visibility is reduced due to glare from surrounding brightness, cancel the illumination dimmer. NOTE
Speed Unit Selector In some countries, you may have to change the speed units between km/h and mph. When pressing the selector knob, the speed units in the instrument cluster will change.
Outside Temperature Display When the ignition is switched ON, the outside temperature is displayed.
NOTE
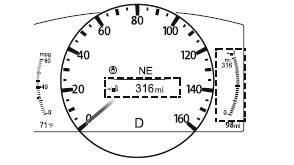
Changing the Temperature Unit of the Outside Temperature Display The outside temperature unit can be switched between Celsius and Fahrenheit. Settings can be changed by operating the center display screen. NOTE When the temperature unit indicated in the outside temperature display is changed, the temperature unit indicated in the engine coolant gauge display changes in conjunction with it. Distance-to-empty This displays the approximate distance you can travel on the remaining fuel based on the fuel economy. The distance-to-empty will be calculated and displayed every second.
NOTE
Average Fuel Economy The average fuel economy is calculated every minute from the total traveled distance on the trip meter and the total fuel consumption, and the average fuel economy for either TRIP A or TRIP B is displayed.
The average fuel economy and trip meters can be reset by pressing the INFO switch for 1.5 seconds or more while in each mode. After the data is cleared, the fuel consumption is recalculated and the - - - km/L (- - - mpg) for the 1 minute prior to it being displayed is indicated. Current Fuel Economy This displays the current fuel economy by calculating the amount of fuel consumption and the distance traveled. The average fuel economy for TRIP A is indicated by a blue arrow.
NOTE Indicates the 0 position when the vehicle speed is about 5 km/h (3 mph) or slower. Maintenance Monitor The following maintenance period notifications can be displayed by turning the Maintenance Monitor on.
When the remaining days to the maintenance period is 15 days or less, or the remaining distance is 1,000 km (600 miles) or shorter, a message is indicated when the ignition is switched ON.
For the setting method and indications for the maintenance monitor, refer to the Maintenance Monitor. Blind Spot Monitoring (BSM) Display Displays the system status.
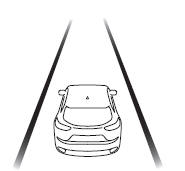
Lane-keep Assist System (LAS) & Lane Departure Warning System (LDWS) Display Displays the system status.
Mazda Radar Cruise Control with Stop & Go function (MRCC with Stop & Go function) Display Displays the currently set system status.
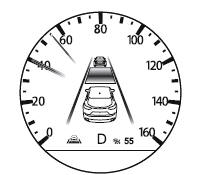
Distance Recognition Support System (DRSS) Display Displays the distance between your vehicle and the vehicle ahead.
Cruise Control Set Vehicle Speed Display The vehicle speed preset using the cruise control is displayed.
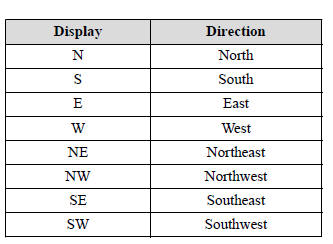
Compass Display The direction the vehicle is moving is displayed in one of eight directions while the vehicle is being driven.
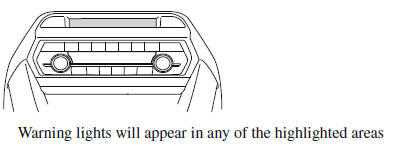
Warning (Display Indication) A message is displayed to notify the user of the system operation status and malfunctions or abnormalities. If the warning light turns on/flashes simultaneously or a symbol is indicated in the display, check the information regarding the warning light or symbol. For messages not indicating a symbol, follow the instructions indicated in the multi-information display. Warning/Indicator Lights Instrument Cluster varies depending on model and specifications. Instrument Cluster
Center of Dashboard
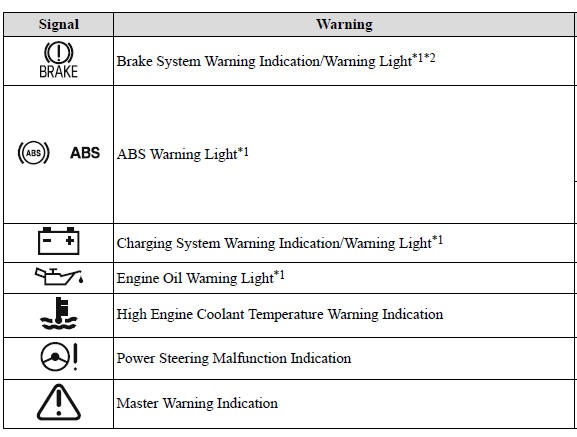
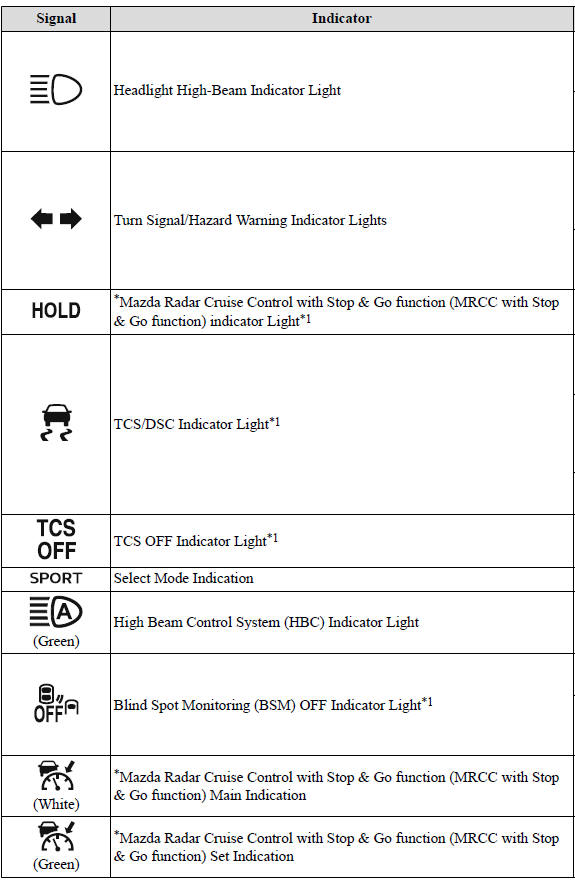
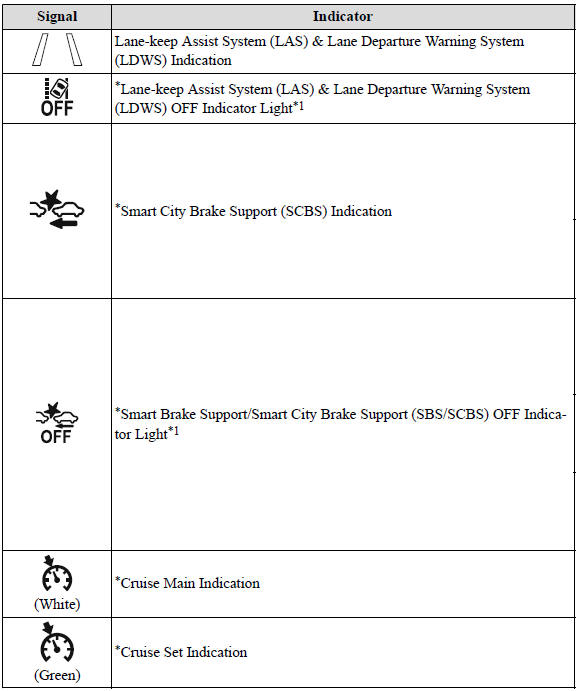
Warning Indication/Warning Lights These lights turn on or flash to notify the user of the system operation status or a system malfunction.
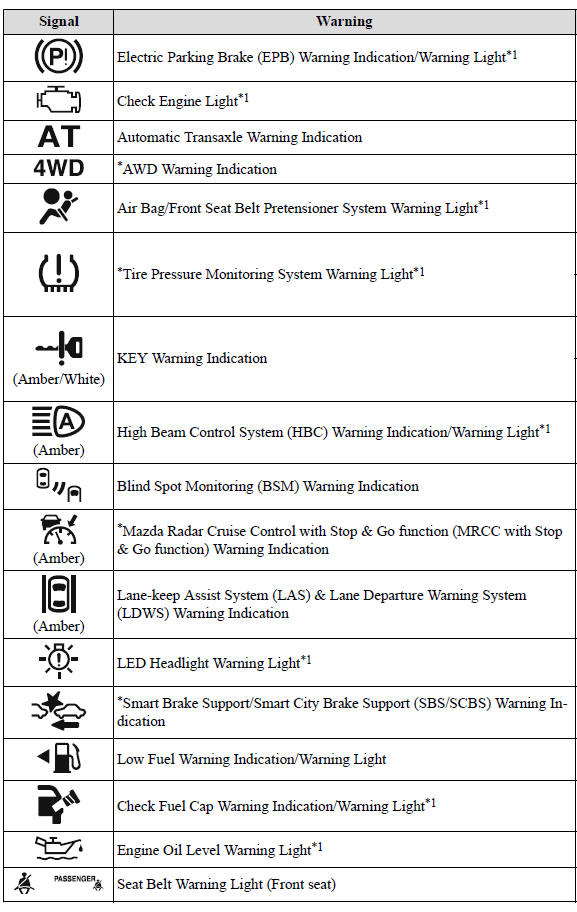
*1 The light turns on when the ignition is switched on for an operation check, and turns off a few seconds later or when the engine is started. If the light does not turn on or remains turned on, have the vehicle inspected at an Authorized Mazda Dealer. *2 The light turns on continuously when the parking brake is applied. Indication/Indicator Lights These lights turn on or flash to notify the user of the system operation status or a system malfunction.
*1 The light turns on when the ignition is switched on for an operation check, and turns off a few seconds later or when the engine is started. If the light does not turn on or remains turned on, have the vehicle inspected at an Authorized Mazda Dealer. Wrench Indicator Light
The wrench indication is displayed under the following conditions.
NOTE
|
 ) indicates
that the fuel-filler lid is on the left side
of the vehicle.
) indicates
that the fuel-filler lid is on the left side
of the vehicle.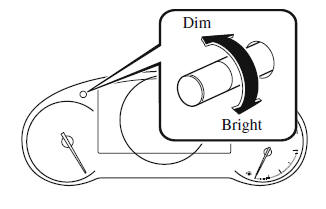


See More:
Mazda CX-9 Owners Manual > 360º View Monitor: Top View/Rear View
Use the top view/rear view to assist in checking the safety of the surrounding area when accelerating from a stop, parking, or stopping the vehicle. Range of displayed screen image (Screen display) (Actual condition) NOTE In the top view screen, the areas in black at the front and rear of the vehicl ...
Mazda CX-9 Owners Manual
